If you decide to employ JPEG2000’s lossy compression scheme, you will also have to determine the degree to which you are willing to compress your files; you’ll have to work to identify that magic spot where you realize a perfect balance between file size reduction and the preservation of image quality.
Of course, there is no magic spot, no perfect answer -- not for any single image, and certainly not for the large batches of images that you will want to process using a single compression recipe. Regardless of whether you decide to control the application of compression by setting the compression ratio, using a software-specific “quality” scale, or by signal-to-noise ratio, you will want to test a variety of settings on a range of images, scrutinize the results, and then decide where to set your software.
Below I describe a Photoshop technique for overlaying an original, uncompressed source image, with a compressed version of the image to measure the difference between the two, and to draw your attention to regions where the compressed version of the image differs most significantly from the source image. Credit for the technique belongs to Bruce Fraser.
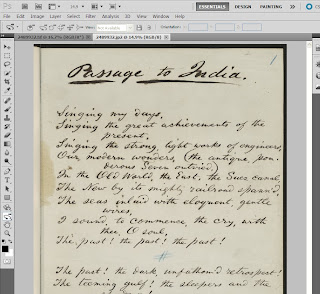
1. First, open up the two images that you want to compare (the original source image, and the compressed JP2 derivative) in Photoshop.

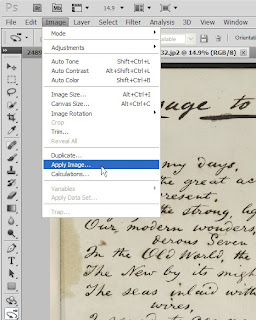
2. Next, go to the “Image” menu and select “Apply Image”.

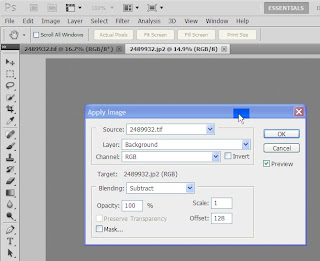
3. Set Blending to “Subtract”; Scale to “1”; and Offset to “128.“

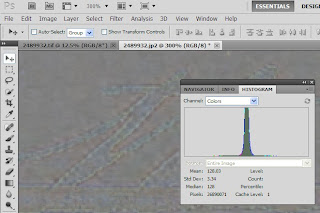
4. The differences between the two images are now visible (you may need to magnify the image beyond 100%), and the standard deviation between the two copies can be displayed on the Histogram panel.
(A standard deviation of zero indicates that the two copies are identical and that the compressed version was losslessly compressed.)

Another option: You can also create a two layer image in PS where one layer is the source image, the second layer is the compressed copy, and by setting the blending option to “difference”. You may find the technique described in detail above preferable, if only because it makes the variance between the two copies more easily visible by shifting the pixel-to-pixel differences into the middle gray region.
Within the group that I manage, we modulate compression using PSNR. We test each candidate setting on a large number of images and then examine some number of the least and most compressed images in the set. We repeat the process until we have zeroed in on what seems to be the best setting.
Good luck!

No comments:
Post a Comment