October 01, 2010

Guest post: Examining losses, a simple Photoshop technique for evaluating lossy-compressed images

Bill Comstock, Head of Imaging Services at Harvard College Library, writes a second post about using Photoshop to evaluate lossy compressed images.

If you decide to employ JPEG2000’s lossy compression scheme, you will also have to determine the degree to which you are willing to compress your files; you’ll have to work to identify that magic spot where you realize a perfect balance between file size reduction and the preservation of image quality.

Of course, there is no magic spot, no perfect answer -- not for any single image, and certainly not for the large batches of images that you will want to process using a single compression recipe. Regardless of whether you decide to control the application of compression by setting the compression ratio, using a software-specific “quality” scale, or by signal-to-noise ratio, you will want to test a variety of settings on a range of images, scrutinize the results, and then decide where to set your software.

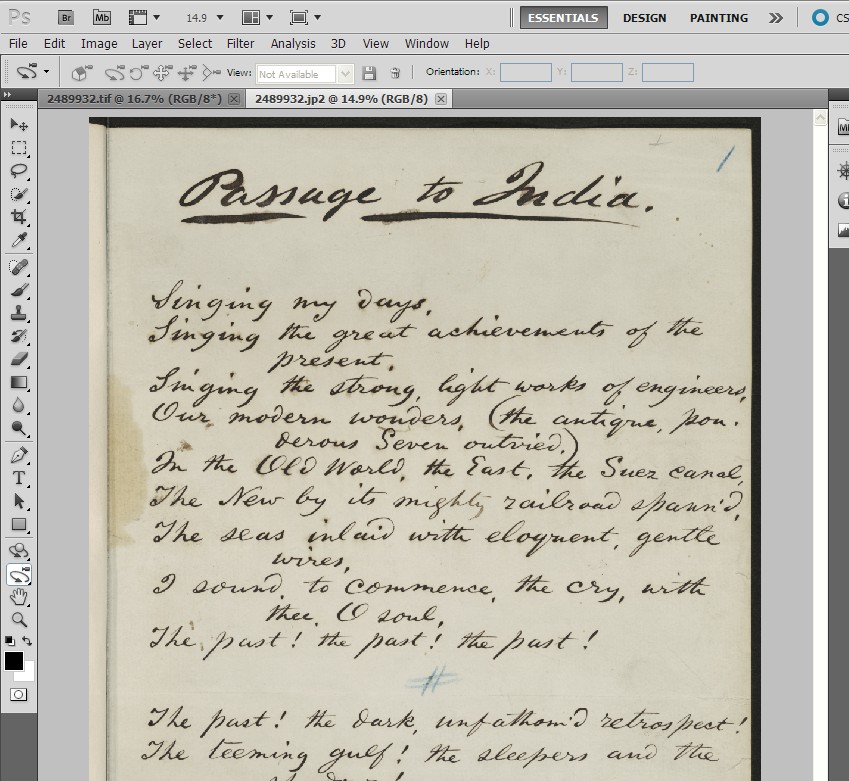
Below I describe a Photoshop technique for overlaying an original, uncompressed source image, with a compressed version of the image to measure the difference between the two, and to draw your attention to regions where the compressed version of the image differs most significantly from the source image. Credit for the technique belongs to Bruce Fraser.

1. First, open up the two images that you want to compare (the original source image, and the compressed JP2 derivative) in Photoshop.


2. Next, go to the “Image” menu and select “Apply Image”.


3. Set Blending to “Subtract”; Scale to “1”; and Offset to “128.“


4. The differences between the two images are now visible (you may need to magnify the image beyond 100%), and the standard deviation between the two copies can be displayed on the Histogram panel.

(A standard deviation of zero indicates that the two copies are identical and that the compressed version was losslessly compressed.)


Another option: You can also create a two layer image in PS where one layer is the source image, the second layer is the compressed copy, and by setting the blending option to “difference”. You may find the technique described in detail above preferable, if only because it makes the variance between the two copies more easily visible by shifting the pixel-to-pixel differences into the middle gray region.

Within the group that I manage, we modulate compression using PSNR. We test each candidate setting on a large number of images and then examine some number of the least and most compressed images in the set. We repeat the process until we have zeroed in on what seems to be the best setting.

Good luck!

September 20, 2010

Calling all JPEG 2000 profiles

We plan to provide delegates of our JPEG 2000 Seminar (16 Nov) with a list of JPEG 2000 profiles from a number of organisations who are currently using the format. Some of these will be briefly presented during a "Profiles" session on the day.

Do you have a profile you are currently using, and would like to distribute to your peers? If so, please send the following details to Christy at c.henshaw@wellcome.ac.uk.

The specific information we're looking for includes:

Used for: (e.g Newspapers)
Conversion software used: (e.g. Kakadu)
File format: (e.g. Part 1 (.jp2)
Lossy or lossless: (choose)
Typical compression: (expressed as a ratio)
Tiling: (e.g. 1024 x 1024)
Progression order: (e.g. RPCL)
No. of decomposition levels: (e.g. 6)
Number of quality layers: (e.g. 12)
Code block size (xcb = yxb): (e.g. 6)
Transformation: (e.g. 9-7 irreversible filter)
Precinct size: (e.g. 128 x 128)
Regions of interest: (yes or no)
Code block size : (e.g. 64 x 64)
TLM markers: (yes or no)

September 14, 2010

New Wellcome Digital Library blog

The Wellcome Library has launched a new blog (wellcomedigitallibrary.blogspot.com/), centered on the development of the Wellcome Digital Library. The blog will be a "a real-time progress report, discussion outlet, and notification area."

This JPEG 2000 blog will still remain focused specifically on the work being done around JPEG 2000 at the Library, but the Wellcome Digital Library blog will provide much broader information on the programme, including:

  • What will be digitised, and how the content will be of use to researchers.
  • How we will facilitate research activity, learning, and discovery.
  • Logistics of digitisation and workflows.
  • In-house vs. outsource options.
  • Metadata.
  • Long-term data management.
  • Delivery formats, speeds, and functions.

September 10, 2010

Guest post: JPEG2000 recipes for the Aware encoder

As our first guest poster, Bill Comstock, Head of Imaging Services at Harvard College Library, writes about the specific "recipes" used at Harvard for producing JPEG2000 images.

I needed help remembering when it was that we began making JPEG2000 images. I ran a search against the Harvard Library’s preservation digital repository, DRS, and it looks like we first deposited a JP2 image in 2004.

Over the intervening six years, we’ve refined and settled on a single recipe that we use to produce lossy-compressed images, and another that we use to produce losslessly-compressed JP2s. I’ll share these recipes with you below. My reasons for sharing are two:

1) Depending upon the software used, there are many encoding combinations to consider - many more than one would have to consider when cooking up the more familiar and less complex TIFF. My group uses the Aware JPEG2000 SDK encoder. Flipping through Aware’s 330 page manual (“AccuRad J2KSuite Developer’s Guide”), I count...152 different command line options. In sharing our recipes (the combination of options and parameters that we invoke ), I’d like to speed others along in developing their own encoding formulations and JP2 production workflows.

2) Not only are there many encoding options to consider, but some are complex and a bit intimidating. Honestly, I don’t know what the “--set-input-raw-channel-subsampling” or “--set-output-j2k-rd-slope” options do. I do think that I understand the options that we use, but I may hear from one of you that my understanding is flawed and that our recipe could be improved upon, or at least better understood and explained. Here you go.

Lossless encoding (Windows command line)

j2kdriver.exe --set-input-image --set-output-j2k-color-xform YES --set-output-j2k-error-resilience ALL --wavelet-transform R53 --set-output-j2k-bitrate 0 --set-output-j2k-progression-order RLCP --tile-size 1024 1024 --output-file-type JP2 --output-file-name

Notes on individual options:

  • “--set-input-image ” reads file into the encoder's memory-buffer and auto-detects the input file format
  • “-- set output-j2k-color-xform YES” I believe that one does not need to call this option explicitly; YES seems to be the default value. The transform referred to here is a colorspace transformation from RGB to YUV. This conversion is made prior to compressing the data. Applying compression to YUV data is more efficient, yielding smaller files than the same compression applied to the unconverted RGB data.
  • --set-output-j2k-error-resilience ALL This function will take the following parameters, each explained below by Aware’s Alexis Tzannes.
  • SOP to enable Start of Packet markers
  • EPH to enable End of Packet Header markers
  • SEG to enable segmentation symbols
  • ALL to enable all of the above
  • NONE to disable all of the options
  • Resynchronization markers: Start of Packet (SOP), End of Packet Headers (EPH). These are used to signal the beginning of each packet and the end of each packet header, and can be used to resynchronize in the case of missing or corrupted data. This allows the decoder to detect and discard entire corrupted packets. So the SOP and EPH are basically tags that signal the beginning and end of a packet (a piece of coded data) in the file. If a packet gets corrupted the error resilient decoder can resync using the next SOP packet marker. The idea here is that if one packet in a file is bad, we don't lose everything that comes after it (as was the case with original JPEG). With JPEG 2000, you could lose a packet and have a small area of the image go bad, but the decoder can recover and keep on decoding.
  • Segmentation symbols: this adds a special four symbol code to specific locations in the compressed data stream, enabling error resilient decoders to detect errors, if this symbol is corrupted. This allows the decoder to detect and discard corrupted bitplanes. So this is similar, but less granular, as it operates at the bitplane level, each bitplane may include multiple packets. Overall, these features would be useful in noise prone environments or over unreliable networks.
  • --wavelet-transform R53” specifies use of the reversible "integer 5-3 filter" (compression) to produce a losslessly encoded JPEG2000 file.
  • --set-output-j2k-bitrate 0 Quoting from the “AccuRad J2KSuite Developer’s Guide”: “Sets the output image bitrate, in bits per pixel. A bitrate of 0 indicates that all the quantized data should be included in the image. This creates lossless images if the R53 wavelet is chosen Sets the output image bitrate, in bits per pixel. A bitrate of 0 indicates that all the quantized data should be included in the image. This creates lossless images if the R53 wavelet is chosen [...].”
  • “--progression-order RLCP” “For a given tile, the packets contain data from a specific layer, a specific component, a specific resolution, and a specific precinct. The order in which these packets are interleaved is called the progression order. The interleaving of the packets can progress along four axes: layer, component, resolution and precinct.” [1] A progression order that begins with “R” (resolution) indicates that the data is organized so that low resolution information will be decoded first, followed and augmented by the remaining higher resolution data in the codestream.
  • --tile-size 1024 1024 This tile size was prescribed, as it was said to be optimally matched to the software our library uses to dynamically generate and deliver JPEG files from stored JP2 masters.

Lossy encoding

j2kdriver.exe --set-input-image-file --set-output-j2k-color-xform YES --set-output-j2k-error-resilience ALL --wavelet-transform I97 --set-output-j2k-progression-order RLCP --set-output-j2k-psnr 46 --tile-size 1024 1024 --output-file-type JP2 --output-file-name

  • --wavelet-transform I97” specifies use of the “irreversible 9-7 filter” to produce a lossy encoded JPEG2000 file.
  • “--set-output-j2k-psnr 46” The pSNR function was selected because it effectively, although imperfectly, modulates the level of compression applied to each image based on the image's particular characteristics: the arrangement and variability of raster values. When we set the pSNR value to 46 db for the page-images that we create, we've come to expect a very high-quality encoded image. There are cases (certain kinds of photographs, illustrations with fine thin lines) where a 46 db setting would produce a too heavily compressed file. Too guard against over-compression, we have developed an effective (although a bit crude) method for dynamically resetting the db value if the file appears to have been too heavily compressed. This is a topic for another day.
  • I believe that most users set a fixed compression ratio, e.g., “--set-output-j2k-ratio ”.

Creating a Windows batch file

If you would like to run your encoding script over a directory of TIFF images (for example), you can create a simple batch file.

Example:

for %%f in (*.tif) do j2kdriver.exe --set-input-image-file "%%f" --set-output-j2k-error-resilience ALL --set-output-j2k-progression-order RLCP --set-output-j2k-ratio 8 --tile-size 1024 1024 --output-file-type JP2 --output-file-name "%%~nf.jp2"

Good luck putting together your own recipes and workflows. Again, please let me know if you have any suggestions for improving our practice.

[1] SO/IEC JTC1/SC29 WG1, JPEG 2000 Editor Martin Boliek, Co-editors Charilaos, C. and E.Majani. "JPEG 2000 Part I Final Committee Draft Version 1.0.", 2000, http://www.jpeg.org/public/fcd15444-4.pdf (accessed September 3, 2010).

Bill Comstock
Head, Imaging Services
Harvard College Library
Widener, D70C
Harvard Yard
Cambridge, MA 02138
http://imaging.harvard.edu/

August 27, 2010

JPEG 2000 for the practitioner - free one-day seminar

This recently announced call for papers/registration may be of interest to our readers:

JPEG 2000 for the practitioner - a one-day seminar

A free seminar to explore and examine the use of JPEG 2000 in the cultural heritage industry will be held at the Wellcome Trust. The seminar will include specific case studies of JPEG 2000 use. It will explain technical issues that have an impact on practical implementation of the format, and explore the context of how and why organisations may choose to use JPEG 2000. Although the seminar will have an emphasis on digitisation and digital libraries, the papers will be relevant to a range of research and creative industries. Places are limited to 80 attendees. Papers will be made available online after the event.

Tuesday 16 November 2010
9am - 5pm
Wellcome Trust, 215 Euston Road, London, UK

This seminar is hosted by the JPEG 2000 Implementation Working Group and the Wellcome Library.

Contributors: please submit the title and a brief abstract of your proposed paper and a bio of the speaker/s to c.henshaw@wellcome.ac.uk by October 4, 2010.

Delegates: if you would like to attend please email your name and the name of your institution to c.henshaw@wellcome.ac.uk by 1 November, 2010.

August 24, 2010

Determining rates of JPEG 2000 compression on a collection-by-collection basis

As a result of our decision to "go lossy", we need to make sure that the level of lossiness is appropriate to the image content. We can't do this on the individual image level, as there are simply too many images. But we can do this on the collection level. We came up with a rule of thumb:

For any given collection of physical formats we will apply a range of different compressions on a representative sample from that collection . We will continue compressing at regular intervals until visual artefacts began to appear on any individual image (i.e. 2:1, 4:1, 6:1, and so on).
Once we determined at which compression level the worst-performing image began to show visual artefacts, we will choose the next lowest compression level (if the worst-performing image showed artefacts at 10:1, we would chose 6:1) and apply that to the entire collection, regardless of how much more compression other material types in that collection might bear.
This rule of thumb allowed us to strike a balance between storage savings and the time and effort in assessing compression levels for a large number of images.

The first "real life" test of this methodology was carried out in relation to our archives digitisation project. We are currently digitising a series of paper archives (letters, notebooks, photos, invitations, memos, etc.) in-house. The scope runs to something like half a million images over a couple of years, and includes the papers of some notable individuals and organisations (Francis Crick being the foremost of these). Archives can be quite miscellaneous in the types of things that you find, but different collections within the archives tend to contain a similar range of materials. This presents a problem if you want to treat images differently depending on their content. The photographer doesn't know, from one file of material to the next, what sort of content they will be handling. So even for a miscellaneous collection, once the image count gets high enough, you have to make the compromise by taking a collection-level decision on compression rates.

For archival collections we needed to test things like faint pencil marks on a notebook page, typescript on translucent letter paper, black and white photos, printed matter, newsprint, colour drawings, and so on. We chose 10 samples for the test. As this was our first test, and we were curious just how far we could go for some of the material types in our sample, we started with 1:1 lossy compression and increased this to 100:1. We used LuraWave for this testing.

For the archives, the compression intervals were: 1:1 lossy, 2:1, 4:1, 6:1, 10:1, 25:1, 50:1, and 100:1. The idea is that at 2:1, the compression will reduce the file size by half in comparison to the source TIFF, and so on.

Not surprisingly, the biggest drop in filesize was seen in converting from TIFF to JPEG 2000 in the first place. At a 1:1 compression rate, this reduced the average filesize by 86% (ranging from 67% to 95%). A 2.1 compression resulted in no noticeable drop in filesize from 1:1 - begging the question what differences there could possible be between 1:1 and 2.1 in the LuraWave software. At the average file size (5mb) at this compression (2:1) , a 500,000 image repository (our estimate for the archives project) would require 2.4 Tb of storage. These averages are somewhat misleading, because while they represent a spread of material, they do not represent the relative proportions of this material in the actual collection as a whole (and we can't estimate that yet).

File size reduction was relatively minimal between 2:1 and 10:1. What is obvious here is that setting the compression rate at, say, 2:1 does not give you a 2:1 ratio. You can achieve in fact a 14:1 ratio or higher. An interesting point to make about the very high experimental compression rates of 25:1 and above, was that output file sizes were essentially homogeneous across all the images, where as at 10:1 and lower, file sizes ranged from 1.5 Mb to 11.5 Mb.

TIFF = 35 Mb
1:1/2:1 = 4.96 Mb (86% reduction)
4:1 = 4.56 Mb (87% reduction)
6:1 = 3.89 Mb (89% reduction)
10:1 = 2.87 Mb (92% reduction)
25:1 = 1.39 Mb (96% reduction)
50:1 = 0.72 Mb (98% reduction)
100:1 = 0.37 Mb (99% reduction)

We found that the most colourful images in the collection (such as a colour photograph of a painting) performed the worst, as expected, and started to show artefacts at 10:1. These were extremely minor artefacts, but they could be seen. Other material types were impossible to differentiate from the originals even at 50:1 or 100:1, surprisingly. These tended to be black and white textual items. Using our rule of thumb, we chose 6:1 lossy compression for the archive collections. Were an archive to consist solely of printed pieces of paper, we would reassess and choose a higher compression rate, but an 89% reduction was highly acceptable in storage savings terms.

You may ask: why not just use 1:1 across the board? Is the extra saving actually worth it? Viewed in comparison to the 1:1 setting, we were getting a better than 20% reduction at 6:1 on average. This continues to represent a significant storage saving when you consider the ultimate goal is to digitise around 3.5 million images from the archive collections. Bearing in mind all the other collections we plan to digitise in future (up to 30m images), the savings become further magnified if we strive to reduce file sizes within the limits of what is visually acceptable.

There are a couple of follow-on questions remaining from all this: first, what size original should you begin with? And secondly, is it possible to automate compression using a quality control (such as peak to signal noise ratio) that allows you to compress different images at different rates depending on an accepted level of accuracy. These will be the subject future posts.

August 13, 2010

The JPEG2000 problem for this week

JPEG2000 isn’t the easiest of formats to disseminate. Browsers typically handle the format with difficulty and then require plugins or extensions to render the format. We don’t want our users to have to download anything just to be able to view our material on-line. So, we plan to convert our JPEG2000 files to a browser friendly JPEG or PDF for dissemination. Both formats admirably handled by browsers. (OK, PDF needs an Adobe plugin but it's commonly included with browsers.) Other formats may come along later. The thing is, how do we do that conversion? There are plenty of conversion tools out there – we use Lurawave for the image conversion. But then the question becomes when do we convert from a master to a dissemination format? Especially if we want a speedy delivery of content to the end user.

One of the guiding principles behind our decision to use JPEG2000 was that we could reduce our overall storage requirements by creating smaller files than we might have done if we’d used, say, TIFF. So if we automatically convert every JPEG2000 to a low res thumbnail JPEG, a medium res JPEG and a high res JPEG and to a PDF then we’re back to having to find storage for these dissemination files. OK, JPEG won’t consume terabytes of storage and nor will PDF, but we’d need structured storage to keep track of each manifestation and metadata to provide to our front end delivery system as to which JPEG was to be used in which circumstances. True, this has been very successfully done for many projects before now but alongside efficiency of storage is efficiency of managing what we have stored and a speedy delivery.

So we plan to convert JPEG2000 to JPEG or PDF on-the-fly at the time each image is requested. The idea is that we serve JPEG2000 images out of our DAM to an image server, the image is converted and the dissemination file served up. Instead of paying for large volumes of static storage we believe that putting the saving on storage into a fast image server will directly benefit those who want to use our material online.

One outcome of a conversation had with DLConsulting is that we've learned that on-the-fly conversion is a potentially system intensive (and at worst inefficient) activity that could create a bottleneck in the delivery of content to the end user. We've said that speed is an issue. We need to efficiently process the tiled and layered JPEG2000 files we plan to create. A faster more powerful image server may help but good conversion software qwill be key. Alongside on-the-fly conversion we plan to use a cache that would hold, in temporary storage the most requested images/PDFs. The cache would work something like this. It has a limited size/capacity and contains the most popular/most often requested images/PDFs. If an image/PDF in the cache were not requested for n amount of time it would be removed from the cache. In practice a user requests an digitised image of a painting, the front end system queries the cache to see if the image is there, if it is its served directly and swiftly to the user. If not the front end system calls the file from the back end DAM. The DAM delivers that image to the image server, which converts JPEG2000 to JPEG and places that images in the cache. From where it can be passed to the front end system and the end user. Smooth, fast and efficient in the use of system resources.

But there are still questions. If we pass the JPEG2000 to the image server for conversion to JPEG that’s fine; but what happens next? Is the JPEG2000 discarded after the conversion process leaving only the JPEGs? Is this the best way to support the zooming in on image sections that we want to offer. The original proposal was to hold only dissemination formats in the cache, now we’re thinking that for flexibility we may prefer to hold the JPEG2000 images and convert them as the image is requested by a user. Is this still the most efficient process? It's easy to build bottlenecks into a system that slow processes down, much more difficult to design a system for speed and efficiency. We’re pretty certain that the conversion–on-the-fly is a good idea and we also think the cache is too. Unless you know differently….